Friday, September 25, 2020

The Pen and Ink Rendering | Sketch like an Architect


This sketch is a Pen and Ink rendering, The Visual Technique you will be doing as part of the curriculum in the early years of architecture. After the Pencil rendering, you will also be working with Pen and Ink. You will be more careful here because you cannot erase what you have already done. The same principle applies in the pencil rendering. The Shading and the tonal value are very important and by constant practice, you can improve  the manner you do the presentation.

Sketch like an Architect | Pen and ink drawings images

Sketches need to be free flowing. The sample drawings are the sketches by an architect. Exercise is the key to making a unique style to sketch like an architect.


The Aim of these example is to show you a simple pen and ink drawings that you can copy. Seeing the example of others will help you gain the confidence in making your own style. Let your ideas overflow and as an exercise, you can look around you and choose any type of structure that attracts you most and start sketching.

Read Books

Read books that can enhance your skills and get a step by step procedure. As a student, you can explore a lot of books you can read and follow their techniques then develop your own later. 


This book is so helpful. 5 Minute sketching by Liz Steel. I found this interesting and its on sale at amazon. I may earn a little amount of commission for sharing this to you, but my intention is to help you get the information you need in your pursuit to learning more about pen and ink drawing ideas.

As a professional, I still enhance my drawing skills despite there are a lot of high end 3d renderings available. The sketches are far better off when you are in the Schematic Design phase of the design process. As an architecture student, you can invest your time and effort in improving your skills. In the long run, you can be more confident to share your thoughts and design ideas if you can sketch well. It will leave a long and lasting impression to your client, no matter what, they will always remember you artistry. That is so unique to everyone.

The artwork can be a collection of your work of art and can also be exhibited if you compile all your works together. I would suggest that you keep all your pen and ink sketches and preserve them. 


Sketch like an Architect


To sketch like an architect is to sketch freely. Create you own style in pen and ink. The important aspect of this presentation is to convey your design ideas into your drawing board with your sketch. The development of all design ideas starts in that sketch of an architect. It is not about the pen you use or the presentation but the story that you want to convey to the client. That's what architects do. 

You may find sketches as not so interesting is it is done very roughly but looking deeper, you will understand the way the sketches communicate with what the architect wants to achieve. The design rather than the art. Though sketches becomes a form of art when executed by an architect.

Useful Drawing Tools

These are the useful drawing tools you need. As an artists, you will be experimenting a lot of drawing tools and use them in your pen and ink rendering works. The useful pens are not necessarily expensive, there are tons out there that you can experiment with.

Mechanical Pencil
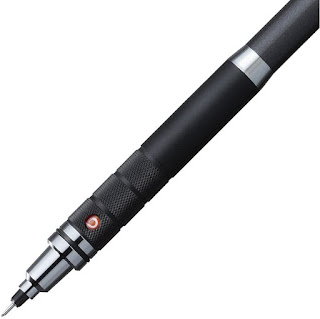
Pencil are very useful in the architectural sketches. This is a mechanical pencil is different from the usual pencil. It is called mechanical because you can control the lead coming out from the tip and it comes in different thickness. For beginners, this is always the "Rule of Thumb" - "Never draw without a guidelines", Yes, the pencil plays that important role. You can use this thin line as a guide to your drawing and this is usually when you want to finalize your pen and ink sketches. This will help you make a clean presentation. Though seasoned architects and artists go directly to their design sketches using pen. As a beginner, it would help a lot do this exercise to master the control of your hands. The later, sketch freely with precision.


Fine Point Pen 

For Pen and Ink, these fine point pen are very useful, it comes with different point from 0.1 to 0.8. You can mix the use of all of the line thickness to give distinction and character to your sketches. Thick lines can be used to outline the object and thin lines for shading, giving emphasis to the tonal value of the drawing. There are different line strokes you can use for this exercise. Some straight lines, vertical lines, horizontal lines, diagonal,  cross hatch and many others. 
The sketch of an architect can be very interesting and every line you will see tells a story. The strokes means a lot and may even pose a work of art at some point. That is why it is good to keep all your sketches and when you put them all together, you can create a story line leading to the development of the design study or it can be plainly considered as a work of art.

That's the uniqueness of the architectural profession, it is an art and a science. The combination of which is architecture.


Marker Pens


Marker Pens are a good complement to your pen and ink renderings, this will be covered in another post but to give you a brief overview, you can add color into your drawings using these marker pens. The pen and ink rendering is already complete in itself and will stand out in the presentation, but adding color would create a different artistry and impression to the drawing.  You can decide whether to use this or not but you can also plan for which type pen and ink rendering presentation you will be using this. For Architects, Pen and Ink are usually for the design study and analysis where you are still developing the design idea. The changes in design are evolving and mostly the editing is quick and it is done in the same sketch. Some use other tracing papers to overlay the original drawing and do the editing on the new tracing paper, so as to get comparison with what is working based on the design concept of the building he is working on. 

Markers on the other hand are used as a finishing touch to the sketch, though it is still in the schematic stage, it goes further on the design study to represent the color schemes of the building design idea and make the initial design study on the building materials. 


You can find this in Amazon. I was browsing through the internet and I have come across these marker pens which i thought would add to the additional information you need in your pursuit to improving your sketching skills and visual presentation techniques. Here's the link to this product on Amazon.


The Pencil Art


The Pencil Art Drawing is for everyone that has the desire to learn. You can consider this as part of your hobby and a therapy as well. For those who have experienced and enjoyed working on the pencil drawing, they can really testify to that. 

One of the major factor that is stopping you is the lack of interest because you think its complicated, but if you start with the basic and the willingness to learn, you can explore anything you can really imagine. 

I can recommend you to an online class on Pencil Art Drawing course. This course is available and you can enroll anytime.

Here's my on review of the course. This is an affiliate course where I earn a little amount of money. enroll now and start learning this skill. 

 Pencil Art Drawing Course Review

I made a little review on this book and at the end of it, you can find the link to access if you will consider buying. I am always on the lookout for ways to improve my drawing skills. I do this hunting around the internet to see if i can find new tutorials. I stumbled across a cool pencil drawing site that I think is going to make a HUGE difference, especially if you want to draw realistically.  

 It is a pencil drawing course that specializes in taking beginners and teaching them how to draw in a realistic style. The course itself is online video, so you can access it from anywhere in the world- the videos worked so perfectly on my tablet and phone.


Each class is two hours long so you can even draw with which watching the video, nothing is left to the imagination. The course starts off by showing you all the equipment you need and the basic strokes. Even in this video I picked up a cool tip of erasing.

What I like is that each lesson builds on the previous so you are never thrown into the deep. Each class has it's own concept of technique that you need to master, for example, in the second class you learn how to spot the different tonal values. In this class Nolan ( the Instructor ) uses different styrofoam objects to show you the light effects to the tonal values. The way to explains it makes it so easy to understand, like theory being explained in a practical way.

With each class you get a downloadable template which you can print our and use that to transfer to your drawing paper. You then also get a high quality photo of the reference and the final drawing. They are laid out in the pdf in such a way that when you print it our, each are exactly the same size. This makes it easy to judge sizes while drawing.  

In each class you complete a drawing project. Like in the second class, you draw a realistic spoon. At the beginning of the class in thought it was going to be difficult, but after watching the explanations at the start of the class and the practical demo, it turned out to be quite easy. 

The next four lessons are also still life drawing. There is an onion and garlic still life, transparent wine glass, rose and an apple drawing. In each of these you learn all about creating a texture and depth in your drawings as well as drawing negatively and how to draw reflective objects. 


From there you start drawing portraits. Nolan Shows you how to draw all the major features like the eyes and mouth. What I like was that he shows you what to look out for with each one. Once you have completed say the ear class, you will be able to draw any earn and not just one from the class itself.

What really makes this course stand out from the rest is that it goes much deeper than any of the other courses I have seen. There are even classes on how to draw material texture and hands. 

The course i brand new, so is currently launch special at less than half price. Why don't you go and check it out for yourself, you may be able to still bag yourself this bargain as well.


Click the link Below:

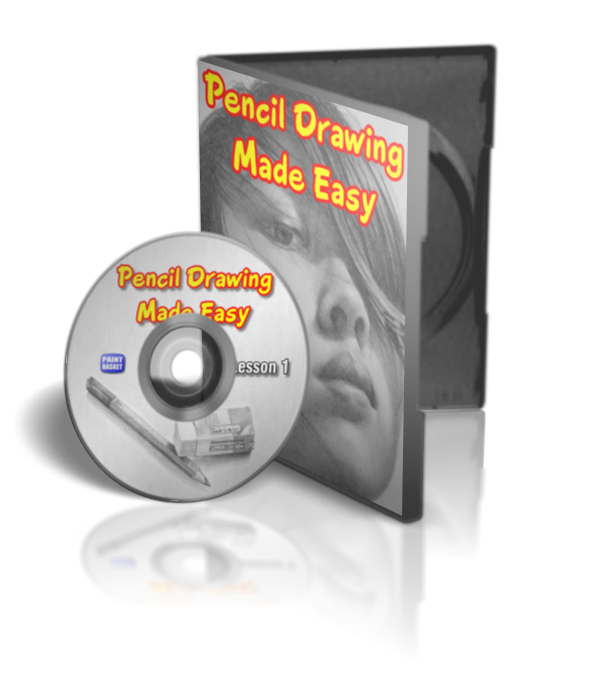
Pencil Drawing Made Easy 


Wednesday, September 23, 2020

Pen and Ink Illustration

 Pen & Ink | Advance Visual Technology course


The Pen & ink rendering is the next step in the learning skills to visual technology. This is enhance your Design Presentation technique taught in architectural course. 

After learning the skills in Pencil Rendering, you will also learn the skills in using Pen and Ink to help you develop the hand sketching technique. Changing your medium from pencil to Pen and ink will develop your skills by becoming more careful about the way you put the strokes into your drawing paper because you are dealing with a permanent drawing. Pencil can easily  be erased as compared to the pen and ink. The pen and ink is much cleaner and each of the line thickness can be emphasized.  

At this stage, you will enjoy using different strokes and line techniques to create your own style of presentation. 

The initial stage of your Design practice, hand sketching is still the best tool used in the presentation of your design concepts and ideas. This will even leave a high impression about your artistry, where you are giving the signal to your client that you are up to providing the highest work of art.


Pencil Drawing Made Easy


This is  to get you started with Pencil Drawing made easy for you to follow. Enjoy using pencil drawing if you are considering to get started with Visual Art. Visual Art or Visual Technology is part of the Architectural Course and it is one of the basic and foundational course you will be taking. The Aim of Pencil drawing is to help cultivate your creativity by controlling your hands coincide with the vision. 

Visual Art, that's the essence of it, Whatever you see can be your reference to your pencil drawing and therefore translate that into your paper. The more you focus on the detail, the more your mind tells your hand to draw. Most difficulties are found in that stage where your hand and your mind through your vision are collaborating. Let your mind control your hand instead of your hand controlling your mind.  

There are some skills you need to develop in this early stage, First is the precision on scaling. When you are looking at a reference, "a still life" you need to identify the proper size of the object fitted into your drawing paper. The scale of the object, the distances between, like in this example the eye distances, the nose, the ears and the mouth plus all the details you see. Putting them all together, you can create a realistic drawing. It is perfectly done by practicing your eyes, and your hands drawing on scale and proportion. The second is the Tonal value. Which side will have the darker shades and which one will have the lighter shades. This will help you exercise how hard and how soft you can control your pencil. Though there are different types of pencil and its grade, it would be better to learn to control of the tonal value. And lastly, the different strokes using line strokes. 

I would recommend that you keep learning  on your free time to develop the skill in Pencil Drawing. I have been looking for some helpful resources you might be interested with and I found a book that is very helpful. This is and affiliate program and If you would consider buying, i can earn a little portion of the sales, but other than that, I would recommend that you take some time learning the process.


I made a little review on this book and at the end of it, you can find the link to access if you will consider buying. I am always on the lookout for ways to improve my drawing skills. I do this hunting around the internet to see if i can find new tutorials. I stumbled across a cool pencil drawing site that I think is going to make a HUGE difference, especially if you want to draw realistically.  

 It is a pencil drawing course that specializes in taking beginners and teaching them how to draw in a realistic style. The course itself is online video, so you can access it from anywhere in the world- the videos worked so perfectly on my tablet and phone.

Each class is two hours long so you can even draw with which watching the video, nothing is left to the imagination. The course starts off by showing you all the equipment you need and the basic strokes. Even in this video I picked up a cool tip of erasing.

What I like is that each lesson builds on the previous so you are never thrown into the deep. Each class has it's own concept of technique that you need to master, for example, in the second class you learn how to spot the different tonal values. In this class Nolan ( the Instructor ) uses different styrofoam objects to show you the light effects to the tonal values. The way to explains it makes it so easy to understand, like theory being explained in a practical way.

With each class you get a downloadable template which you can print our and use that to transfer to your drawing paper. You then also get a high quality photo of the reference and the final drawing. They are laid out in the pdf in such a way that when you print it our, each are exactly the same size. This makes it easy to judge sizes while drawing.  

In each class you complete a drawing project. Like in the second class, you draw a realistic spoon. At the beginning of the class in thought it was going to be difficult, but after watching the explanations at the start of the class and the practical demo, it turned out to be quite easy. 

The next four lessons are also still life drawing. There is an onion and garlic still life, transparent wine glass, rose and an apple drawing. In each of these you learn all about creating a texture and depth in your drawings as well as drawing negatively and how to draw reflective objects. 

From there you start drawing portraits. Nolan Shows you how to draw all the major features like the eyes and mouth. What I like was that he shows you what to look out for with each one. Once you have completed say the ear class, you will be able to draw any earn and not just one from the class itself.

What really makes this course stand out from the rest is that it goes much deeper than any of the other courses I have seen. There are even classes on how to draw material texture and hands. 

The course i brand new, so is currently launch special at less than half price. Why don't you go and check it out for yourself, you may be able to still bag yourself this bargain as well.

Click the link Below:

Pencil Drawing Made Easy 

 Here are some more Pencil Drawing sample I made 


Follow my other Pencil drawings and art works on Pinterest 


Thursday, May 28, 2020

Schematic Design | Townhouse

What is a Townhouse Design?


Townhouse Design


Townhouse is defined as a single-family dwelling unit constructed in a group of three or more attached units. It is normally used on narrow building lots or high-density parcel. The construction shares common foundation to roof but with no vertical overlap of any parts to the adjoining unit. Usually share open spaces to either one side or both sides but with a private parking for each unit.

What is Schematic Design?


A Schematic Design is the initial design studies of an architect, the first stage of his professional practice, in submitting a design proposal to his client. The Schematic Design includes all other aspects of design schemes using free hand sketches to be able to analyze the importance of each of the aspects of the design requirements. The design is developed through the process and in constant meeting with his client. 

The Interpretation of the client's design requirement is the presented in sketch or 3d model to show the initial design. The Schematic may lead to further develop the design in terms of its form and its design character which would affect the color, balance and harmony of all the elements in the design composition.

The Schematic Design is a very important document in the practice of architecture. It will serve as a basis and guide leading to the next stage of his design practice. The ultimate goal of the schematic design is to be able to construct the design, where documentation will be based on the final and approved design scheme. While the design is in the schematic design, all design presented are oftentimes referred to as "Conceptual Design". The four stages come progressively from Schematic Design phase, Design Development, Contract Document and the Construction stage.

The Townhouse Design and the 3d modelling method


Going back to our Design Scheme, The presentation method is done in 3d model done in sketchup. As we cover the 3d modelling in our blogpost and the architectural design niche, It would be better to relate everything into the tool used that covers the 3d modeling and the art of presentation as well in parallel with the discussion in the architectural profession and the practices.

Sketchup in the design conceptualization of any structure, together with all the softwares in the production of the documents like; autocad and revit for a more precise documentation of the drawing requirements in constructing the design, for other 3d rendering softwares like Lumion, 3D Studio and Rhino to name a few.

What led the designer to come up with that kind of Design Scheme?