Saturday, December 6, 2014

Choosing a Template

video tutorial 2 - Choosing a Template
3dartrender


1. Video Tutorial 1 - Downloading Free Sketchup
2. Video Tutorial 2 - Getting Started - Choosing a Template (this tutorial)
3. Video Tutorila 3 - The Drawing Tools - LINE TOOLS
4. Video Tutorial 4 - The Drawing Tools - SQUARE TOOL, ARCS AND CIRCLES
5. Video Tutorial 5 - The Drawing Tools - FOLLOW ME TOOL
6. Video Tutorials 6  - The Editing Tools - COPY, MOVE AND SCALE TOOL
7. Video Tutorials 7  - The Editing Tool - OFFSET TOOL 

back to 3dartrender tutorial homepage

It would be wise to start using a sketchup by choosing the right template for a particular project you are working. The templates relate to the unit set-up of a drawing. If you are working on a large scale project or a small 3d printing layout, it has a corresponding template. This is how user-friendly and easy to use the sketchup is. This will save you a lot of time and effort.

You can follow through this lesson and watch the video above to get you started .


What Template is suitable for you?

There are a lot of templates you can choose from, you can have the choice of having to set up your drawing to english system or metric system. It can also be either in feet or in inches, meters or millimeters.


From the selection, you can determine what kind of drawing you will produce. It will be on a macro or micro settings. If you are working on a large scale, then millimeter or inches will be irrelevant, or vise versa. Your drawing composition will be affected by the settings you choose. It is better to choose the right template for the right kind of drawing. 


The best way to answer the question is to determine what kind of drawing will you produce?
e.g. Doing a masterplan of a community or preparing a drawing for the construction of a cabinet. You will see the difference and notice a slowing down of your computer's performance if the setting is wrong.


For Sketchup Pro 2014, this is the sample of the template availabe in sketchup 


If you are using google sketchup pro, this is what it looks like;


Which one is best for you - you choose 

Drawing Tools - Square, Circles & Arcs


Video Tutorial 4 -  
Drawing Tools - SQUARE, CIRCLES & ARC with the introduction to PUSH/PULL
3dartrender


back to 3dartrender tutorial homepage

1. Video Tutorial 1 - Downloading Free Sketchup
2. Video Tutorial 2 - Getting Started - Choosing a Template 
3. Video Tutorila 3 - The Drawing Tools - LINE TOOLS 
4. Video Tutorial 4 - The Drawing Tools - SQUARE TOOL, CIRCLE & ARC with Introduction
to PUSH/PULL TOOL (this tutorial)
5. Video Tutorial 5 - The 3D Creation Tool - THE FOLLOW ME TOOL


After learning to use the Line Tool  from previous tutorial, this time you will be introduced to the use of square or rectangle too, circle and the arc tool.

This is also similar to the line tool, where you click the rectangle tool. You can choose a first point to create the first corner of the square/rectangle. You can also specify the length and the width from your keyboard. This is a good way to start a plan in architecture. 


Downloading Free Sketchup

video tutorial 1 - Downloading Free Sketchup

3dartrender 


1. Getting Started - Downloading Free Sketchup (this tutorial)
2. Getting Started - Choosing a Template in Sketchup
3. Getting Started - The Drawing Tools - LINE TOOLS
4. Getting Started - The Drawing Tools - SQUARE TOOLS, ARC AND CIRCLES
5. Getting Started - The Drawing Tools - THE FOLLOW ME TOOL
6. Video Tutorials 6  - The Editing Tools - COPY, MOVE AND SCALE TOOL 
7. Video Tutorials 7  - The Editing Tool - OFFSET TOOL 

You can Download Free Sketchup and get yourself started with the use of Sketchup. Follow these simple steps as shown on the video.

1. Go to the the official website www.sketchup.com

2. Click "download sketchup"
3. Save the file to your hard drive
4. Click and run - installs automatically

Before Downloading, you will fill out a form stating your name and email address.

You will be ask to what purpose you are downloading sketchup and pick "for educational purpose"
Indicate what operating system you are using - Mac or Windows

Lastly, choose the product you are downloading - choose "sketchupmake"

That's it and you are good to go. Once you have installed in your computer, you can go over with the tutorials here.


Go Back to 3dartrender Online Resources

The Follow Me Tool

Video Tutorial 5 -  
The FOLLOW ME TOOL 


1. Video Tutorial 1 - Downloading Free Sketchup
2. Video Tutorial 2 - Getting Started - Choosing a Template 
3. Video Tutorila 3 - The Drawing Tools - LINE TOOLS 
4. Video Tutorial 4 - The Drawing Tools -  SQUARE TOOL, CIRCLES AND ARCS
5. Video Tutorial 5 - The 3D Creation Tool - THE FOLLOW ME TOOL (this tutorial) 
6. Video Tutorials 6  - The Editing Tools - COPY, MOVE AND SCALE TOOL 
7. Video Tutorials 7  - The Editing Tool - OFFSET TOOL 


I came across the use of follow me tool in Sketchup. There are 3 easy methods to use this tool. This is what I have discovered using this tool.


Using the "Follow Me" tool
Here's the procedure on how to use the Follow Me Tool

Method 1 - following a specific path 


Draw a section of the object you want to model in 3D and the path where you want your 3d object to follow as shown on this sample figure:
section 1
path to follow

Select the section and pick "follow me tool" then drag the section towards the path, a red line will appear on the path and the section you have created is turning into a 3d model following the path.


drag the section towards the red line following the path
the final 3d model using "follow me tool"

Method 2 - Following a path by picking the path " follow me tool" 

This is another easy method using this tool. Having your section ready, pick the path first

If the path is complicated and hard to drag when using the first method, this method will be very helpful.


Method 3 -  by picking a surface

If you have a surface regardles of its shape, you can still use the follow me tool by picking the surface first and then the section. The section you are creating will follow the perimeter of the surface.

The Section

The Surface

The Final 3D model

Hope this will help you use the follow tool mor effectively and efficiently.


Tuesday, November 18, 2014

Getting started with the Line tool in Sketchup

Video tutorial 3 - The Drawing Tools - LINE TOOLS
3dartrender

If you are new to Sketchup, you can follow and watch Video Tutorials outlined below:  These tutorials are arranged for you to be able to access all the series from Video Tutorial 1 (for beginners)

1. Video Tutorial 1 - Downloading Free Sketchup
2. Video Tutorial 2 - Getting Started - Choosing a Template 
3. Video Tutorila 3 - The Drawing Tools - LINE TOOLS (this tutorial) 
4. Video Tutorial 4 - The Drawing Tools -  SQUARE, CIRCLES AND ARC TOOLS
5. Video Tutorial 5 - The 3D Creation Tool- FOLLOW ME TOOL
6. Video Tutorials 6  - The Editing Tools - COPY, MOVE AND SCALE TOOL 
7. Video Tutorials 7  - The Editing Tool - OFFSET TOOL 


The LINE tool is your starting point in any drawing composition. As a designer, Sketchup has developed this tool which is similar to your pencil or pen tool in manual sketchin. Using the line tool (pencil tool, represented by the icon) is easy. Take note on the 3 guidelines that appear in the drawing interface. The Vertical line (represented by green line), the horizontal line (represented by the red line) and the upward line (represented by the green line). 

In the beginning, you will be drawing the lines that corresponds to the default coordinate system that corresponds to the vertical and horizontal lines. Notice that the line that you draw is represented by a black line, whenever you drag the pencil tool, the black line will turn to either green, red or blue, that means the next line you will be creating is parallel to the corresponding color. Pick the first point then drag towards the direction you want your line to appear, either vertical (green) or horizontal. You can enter a certain value using your keyboard and the value can be found at the lower right corner of the screen. 


Getting started with Sketchup using Square, Circles & Arc tool


Video Tutorial 4 -  
Drawing Tools - SQUARE, CIRCLES & ARC with the introduction to PUSH/PULL


If you are new to Sketchup, you can follow and watch Video Tutorials outlined below:  These tutorials are arranged for you to be able to access all the series from Video Tutorial 1 (for beginners)

1. Video Tutorial 1 - Downloading Free Sketchup
2. Video Tutorial 2 - Getting Started - Choosing a Template 
3. Video Tutorila 3 - The Drawing Tools - LINE TOOLS 
4. Video Tutorial 4 - The Drawing Tools - SQUARE TOOL, CIRCLE & ARC with Introduction
to PUSH/PULL TOOL (this tutorial)
5. Video Tutorial 5 - The 3D Creation Tool - THE FOLLOW ME TOOL 
6. Video Tutorials 6  - The Editing Tools - COPY, MOVE AND SCALE TOOL 
7. Video Tutorials 7  - The Editing Tool - OFFSET TOOL 


Drawing Tools are your most commonly used tools in creating any design composition. These tools are simple and straight forward. This is to help you create two-dimensional to 3d object. 

The starting point is to create a line, or arc or even squares and circles that is an objects with a surface that can be extruded using PUSH/PULL tool. This is the only tool you can use to create three dimensional objects. LINE and ARC tools are used to create irregular shapes as in the creation of a plan layout in different shapes, connecting the first point with your last created point, the object you drew will become a closed polygon (with a surface) that can be extruded too. This is a great way to help you understand the basic principle in creating a 3d object.  Watch the video tutorial and take some time to explore these tools. Once you have learned and got familiar with the tool, you are more likely to enjoy using sketchup.

Friday, November 7, 2014

Before Using Sketchup choose a Template

It would be wise to start using a sketchup by choosing the right template for a particular project you are working. The templates relate to the unit set-up of a drawing. If you are working on a large scale project or a small 3d printing layout, it has a corresponding template. This is how user-friendly and easy to use the sketchup is. This will save you a lot of time and effort.

You can follow through this lesson and watch the video to get your started from choosing the template here.


What Template is suitable for you?

There are a lot of templates you can choose from, you can have the choice of having to set up your drawing to english system or metric system. It can also be either in feet or in inches, meters or millimeters.

From the selection, you can determine what kind of drawing you will produce. It will be on a macro or micro settings. If you are working on a large scale, then millimeter or inches will be irrelevant, or vise versa. Your drawing composition will be affected by the settings you choose. It is better to choose the right template for the right kind of drawing. 

The best way to answer the question is to determine what kind of drawing will you produce?
e.g. Doing a masterplan of a community or preparing a drawing for the construction of a cabinet. You will see the difference and notice a slowing down of your computer's performance if the setting is wrong.


For Sketchup Pro 2014, this is the sample of the template availabe in sketchup 


If you are using google sketchup pro, this is what it looks like;


Which one is best for you - you choose

Wednesday, October 22, 2014

Starting with Sketchup

 After Downloading, you can install the free version and follow the installation instruction. If this is the first time you will use sketchup, this will guide your through the process and follow along with the tutorials provided. Let us walk through the interface of Sketchup and explore all the tools you are going to use.


A look inside Sketchup

When you first launch the Sketchup, It will prompt you to choose a template or start using sketchup. see figure below;


The Template will let you set-up the units which are as follows:

1. Simple Template                       - Feet and Inches
2. Simple Template                       - Meters
3. Architectural Design                  - Feet and Inches
4. Architectural Design                  - Millimeters
5. Construction Documentation     - Feet and Inches
6. Construction Documentation     - Millimeters

7. Construction Documentation     - Meters
8. Architectural Design                  - Meters
9. Urban Planning                          - Feet
10. Urban Planning                        - Meters
11. Landscape Architecture           - Feet and Inches
12. Landscape Architecture           - Meters

13. Woodworking                           - Inches

14. Woodworking                           - Millimeters

15. Interior & Production Design    - Inches

16. Interior & Production Design    - Millimeters

17. 3D Printing                               - Inches
18. 3D Printing                               - Millimeters


Choose the units you are comfortable using and for which purpose you will produce your drawing and after that, you can start usign sketchup. In this case, Architectural Design - Meters is selected and click "Start Using Sketchup".

And there you go, you are now ready to start using sketchup


This is how your screen will look like and we will go through all the tools in the next lesson.


Go back to the lesson here:


Watch the Video Tutorial here (Choosing a template)


Thursday, October 16, 2014

Sketchup for beginners

If you are interested in learning and using sketchup, you will really enjoy this because this will guide you through the process. This is intended for beginners who does not have any knowledge about sketchup but are willing to learn. Not only that, it will also help you download and install sketchup for free.


What you need to do?

First let me help you download sketchup for free and will guide you through the process in the installation on your computer.

1. Go to sketchup website here  (go back to this page after you have installed Sketchup for your online tutorial)

This will lead to the Sketchup official website as shown in the image below


Click on the download sketchup. This will lead you to another webpage in the download area. There are 3 steps to follow:

Step 1.  Choose the product - you must answer the following question on where are you going to use the product.
There are options on the  "use the Product" with a drop down menu of 3 selections

 * plan to use sketchup for  -  a. Professional use
                                               b. Personal projects
                                               c.  Educational use

and two types of product, namely;

Sketchup make or Sketchup Pro 2014

You must choose the free version which is the Sketchup Make

In this case, choose the third one which is the "educational use"

Step 2. You must fill up the form with your personal details under the heading "Tell us about yourself. This will ask you of your interest such as:

a. Your profession/ interest 

 if you are an instructor, Students and others. 
Then select the operating system you are using. Windows or Mac?

Step 3

Which version you will download?
Choose the Sketchup Make or Sketchup pro 2014?

Choose the free one (Sketchup Make, otherwise you can purchase the licensed version).

Start downloading. Once you have downloaded the software, you can start installing in your desktop. You are now equipped with the designer's tool and ready to go!

Come back to this site for your online training for beginners.

Start the tutorial, and do it at your own schedule.

Proceed to the next lesson here: Starting with Sketchup


To access the video tutorial on how to download and install Sketchup, go to this page


Sketchup is a good tool in creating any design. A good way to start is to learn how to design a house using sketchup. Once you have learned all these tools, a more advanced tutorial will be posted for your to be able to follow the application. We will start with ways to explore your creativity . A story you can learn from the history of Lego. How it all started and see the insipiration by increasing your creativity and exploring your ideas. Then, designing sill be much easier to achieve. Our short term goal is to work effieciently in using sketchup to design a house


Tuesday, October 7, 2014

Architectural Rendering using sketchup


Architectural rendering comes in a variety of methods and softwares use. Sketchup is a great way to produce architectural rendering. With its unique presentation and wide variety of styles, this is becoming the architect's choice! 

The sketchy style is still attractive to many although it has capabilities of producing high quality photo realistic rendering, yet there are options to do a different kind of presentation as if it is done by the very hand of the artist.

I find this complimentary to 3Dsmax instead of competition. Combining both capabilities, this will result in a more accurate and more refined rendering.

Using sketchup in the 3d modeling and establishing the scene, you can easily show the design right in front of your client, it is more interactive and user friendly.


What are the benefits of using Sketchup?

There are a lot of benefits you can get from using sketchup, here are some of the benefits;

  1. It is so flexible that you can choose any style
  2. It easy to use, you just need to practice and get familiar with creation tools which are literally translated from your manual sketching into digital form
  3. It creates a very low file size but not compromising the quality of rendering and presentation you need
  4. 3D scenes can be created at once and all views can be seen immediately
  5. The actual file from your computer is enough to show the initial design created
  6. Quick editing can be done easily
  7. It is compatible with vray plugin so you can produce a more photo realistic rendering
  8. shades and shadows can be turned on and off and you can create a different mood and scenarios depicting a particular time of the day
Enjoy using sketchup 


see the related article at facebook note here

Sunday, August 31, 2014

What is the importance of Architectural Rendering?


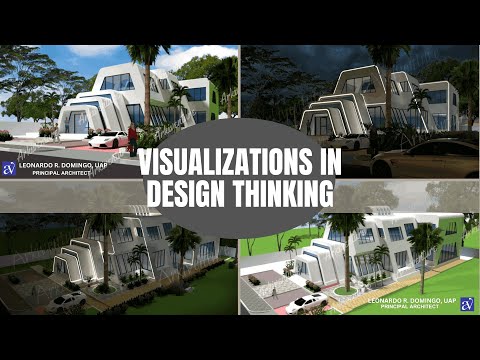
The architectural rendering above is an artist or architect's impression of the overall design intent of the project proposal. It expresses the whole concept and its actual design.

The Importance of Architectural Rendering

Architectural rendering is a competing edge to anyone practicing architecture. The architect/designer may hire a professional 3d renderer to gain more projects. It pays a lot and gains a more winning edge. Aside from the artistry, the business side has more impact on the Architect and gains more popularity. In fact, clients are looking for high-caliber architects, and high-end presentations are more likely to gain more winning projects.

Architectural Renderings are by product of a training initially in any school offering architecture. It is part of the subject where one can have first-hand experience in doing architectural presentations. There are a variety of mediums used in architectural rendering. It can be manual rendering using different multimedia like markers, paint, gouache, watercolors, pen, and many others. Computer-generated renderings are the most popular. This has been the trend in the past 10 years.

Unveiling the Significance of Architectural Rendering in the Practice of Architecture

In the dynamic world of architecture, where innovation and creativity converge, architectural rendering stands as a transformative tool that reshapes the way architects design, communicate, and execute their visions. From conceptualization to presentation and beyond, the importance of architectural rendering in the practice of architecture cannot be overstated. Let's explore the multifaceted significance of this indispensable technique:

1. Visualization and Conceptualization:

Architectural rendering serves as the bridge between imagination and reality. Through the use of advanced software and techniques, architects can transform abstract concepts and design ideas into vivid, photorealistic representations. These renderings allow architects to explore different design options, and experiment with materials, lighting conditions, and spatial arrangements, facilitating informed decision-making during the conceptualization phase.

2. Communication and Collaboration:

In a profession where effective communication is paramount, architectural rendering serves as a universal language that transcends barriers. Renderings enable architects to convey their design intent and vision to clients, stakeholders, and collaborators with unparalleled clarity and precision. Whether presenting to a client, consulting with engineers, or collaborating with interior designers, renderings facilitate seamless communication and foster a shared understanding of the project's goals and requirements.

3. Client Engagement and Approval:

In an era characterized by visual literacy and digital immersion, clients increasingly demand immersive and engaging experiences throughout the design process. Architectural renderings, with their ability to evoke emotions and create compelling narratives, play a pivotal role in captivating clients' imaginations and eliciting their feedback. By presenting realistic renderings that depict the proposed design in its intended context, architects can instill confidence in clients, garner approval, and forge stronger client relationships.

4. Marketing and Business Development:

In a competitive market landscape, architectural firms must distinguish themselves and showcase their expertise to attract clients and secure projects. Architectural renderings serve as powerful marketing tools that enable firms to showcase their portfolio, highlight their design philosophy, and demonstrate their creative prowess. Whether featured on websites, social media platforms, or marketing materials, photorealistic renderings captivate prospective clients, differentiate firms from competitors, and contribute to business development efforts.

5. Design Validation and Iteration:

 The iterative nature of architectural design necessitates constant evaluation, refinement, and validation of design solutions. Architectural renderings facilitate this iterative process by allowing architects to visualize design iterations, assess their spatial qualities, and identify areas for improvement. By generating multiple renderings that explore different design options, architects can refine their designs iteratively, ensuring that the final solution meets the project's functional, aesthetic, and budgetary requirements.


 This is the initial rendering before the post-production to validate and refine the design concept. 


After several attempts to refine the design, the post-production will be done and ready for the Design Presentation and probably be used for the branding and marketing of the proposed project

6. Regulatory Compliance and Approvals:

In an increasingly regulated environment, obtaining approvals from regulatory authorities and complying with building codes and zoning regulations are integral aspects of architectural practice. Architectural renderings aid in this process by providing visual representations of proposed designs that aid in regulatory compliance assessments. By generating accurate and detailed renderings that illustrate compliance with building codes, setbacks, and other regulatory requirements, architects expedite the approval process and mitigate potential conflicts.

In essence, architectural rendering is not merely a decorative embellishment or a technical exercise but is an indispensable tool that permeates every facet of architectural practice. From inspiring creativity and fostering collaboration to facilitating communication and streamlining approvals, architectural rendering plays a pivotal role in shaping the built environment and realizing the architectural visions of today and tomorrow. Embrace the transformative power of architectural rendering, and elevate your practice to new heights of innovation and excellence.

Different types of Architectural Renderings:

Manual Rendering

In the age of digital dominance, where cutting-edge software and technologies often dictate design processes, manual rendering stands as a testament to tradition, skill, and craftsmanship in architectural representation. While digital rendering offers precision and efficiency, manual rendering exudes a unique charm and authenticity that transcends pixels and polygons. Let's delve into the enduring significance of manual rendering in architectural practice;

1. Artistic Expression and Creativity

Manual rendering celebrates architects' innate artistry and creativity, enabling them to express their design concepts with a personal touch and flair. With tools as simple as pencils, markers, and watercolors, architects imbue their drawings with emotion, texture, and character, evoking a sense of warmth and intimacy that digital renderings often struggle to emulate. From delicate hatching to expressive brushstrokes, manual rendering allows architects to explore a diverse range of techniques and styles, infusing their drawings with personality and soul.

 2. Tangibility and Sensory Experience

In an increasingly digital world, where screens mediate our interactions with the built environment, manual rendering offers a tangible and sensory experience that engages the senses on a deeper level. Sketching by hand, feeling the texture of paper beneath the fingertips, and watching colors blend and bleed create a visceral connection between the architect and the drawing. Manual renderings invite viewers to immerse themselves in the drawing, to trace the lines with their eyes, and to appreciate the craftsmanship and attention to detail imbued in every stroke.

3.  Timelessness and Tradition

Manual rendering embodies a rich tradition that spans centuries, transcending technological advancements and passing trends. From the meticulously detailed ink drawings of architectural masters like Giovanni Battista Piraseni to the vibrant watercolor sketches of contemporary artists, manual rendering has endured as a timeless art form that resonates across generations. In an era characterized by rapid innovation and digital disruption, manual rendering reminds us of the enduring value of craftsmanship, patience, and dedication to one's craft.

4. Communication and Storytelling 

Manual rendering excels in conveying narratives and evoking emotions through visual storytelling. By carefully selecting viewpoints, composing scenes, and manipulating light and shadow, architects can create compelling narratives that communicate the essence of their designs. Whether depicting a bustling urban street scene or a tranquil rural landscape, manual renderings transport viewers to imaginary worlds, inviting them to embark on a journey of exploration and discovery.

5. Versatility and Adaptability

Despite the rise of digital rendering techniques, manual rendering remains a versatile and adaptable tool in the architect's toolkit. From quick conceptual sketches to elaborate presentation drawings, manual rendering offers flexibility and spontaneity that digital tools sometimes lack. Architects can effortlessly switch between mediums and experiment with different styles and techniques, adapting their approach to suit the unique requirements of each subject.

Manual rendering embodies the timeless allure of handcrafted artistry in an increasingly digital world. Manual rendering enriches architectural practice with its unique charm and authenticity by celebrating creativity, embracing tradition, and engaging the senses. As Archticts continue to push the boundaries of innovation and exploration, manual rendering will undoubtedly remain a cherished and indispensable aspect of architectural representation for generations to come.

The use of Acrylic Paint in Manual Architectural Renderings 

Acrylic Paint 

Acrylic paint is used in this type of manual rendering. This can be very challenging especially when computers are not capable of creating photo-realistic renderings at the time. This is a big advantage for artists and painters.

You need to have an excellent skill in mixing colors and perspective plotting.


Markers and Pen Sketches


Markers and Pen Sketches are more useful even today. It is the architect's best friend in the schematic design stage. This is to give a quick hand sketch to the client to visualize the idea required by the client. This creates more discussions as to how the architect and his client will arrive at a conceptual design where revisions are very common.

This is also a skill that an architect should possess. It requires a keen sense of proper proportioning and perspective projections. Pen and markers are a good combination to define lines and texture.

Pen and Ink Rendering

Pen and Ink are very similar with markers and pens. Shades and shadows are done through the different strokes and scribbling of the pen. 


3D Modelling Softwares


Sketches are now mimicked in the use of Sketchup. This is a complete revolution to what we can do with computers. Sketchup has been useful in this type of presentation. 3d modeling is made easy.
There are several ways to use SketchUp and the different styles available in this program. Artists would really love to explore and choose the best styles of presentation.

I will show you more examples of presentations in different styles from SketchUp.

Different styles in Sketchup.


3D Studio Max

3d Studio Max with V-ray is the software used in the example above. By knowing the proper way of 3D modeling and rendering set-up, you can achieve a real-time presentation.

This is how we look at the importance of Architectural Rendering.