This sketch is a Pen and Ink rendering, The Visual Technique you will be doing as part of the curriculum in the early years of architecture. After the Pencil rendering, you will also be working with Pen and Ink. You will be more careful here because you cannot erase what you have already done. The same principle applies in the pencil rendering. The Shading and the tonal value are very important and by constant practice, you can improve the manner you do the presentation.
Sketch like an Architect | Pen and ink drawings images
Sketches need to be free flowing. The sample drawings are the sketches by an architect. Exercise is the key to making a unique style to sketch like an architect.


The Aim of these example is to show you a simple pen and ink drawings that you can copy. Seeing the example of others will help you gain the confidence in making your own style. Let your ideas overflow and as an exercise, you can look around you and choose any type of structure that attracts you most and start sketching.
Read Books
Read books that can enhance your skills and get a step by step procedure. As a student, you can explore a lot of books you can read and follow their techniques then develop your own later.

This book is so helpful. 5 Minute sketching by Liz Steel. I found this interesting and its on sale at amazon. I may earn a little amount of commission for sharing this to you, but my intention is to help you get the information you need in your pursuit to learning more about pen and ink drawing ideas.
As a professional, I still enhance my drawing skills despite there are a lot of high end 3d renderings available. The sketches are far better off when you are in the Schematic Design phase of the design process. As an architecture student, you can invest your time and effort in improving your skills. In the long run, you can be more confident to share your thoughts and design ideas if you can sketch well. It will leave a long and lasting impression to your client, no matter what, they will always remember you artistry. That is so unique to everyone.
The artwork can be a collection of your work of art and can also be exhibited if you compile all your works together. I would suggest that you keep all your pen and ink sketches and preserve them.
Sketch like an Architect
To sketch like an architect is to sketch freely. Create you own style in pen and ink. The important aspect of this presentation is to convey your design ideas into your drawing board with your sketch. The development of all design ideas starts in that sketch of an architect. It is not about the pen you use or the presentation but the story that you want to convey to the client. That's what architects do.
You may find sketches as not so interesting is it is done very roughly but looking deeper, you will understand the way the sketches communicate with what the architect wants to achieve. The design rather than the art. Though sketches becomes a form of art when executed by an architect.
Useful Drawing Tools
These are the useful drawing tools you need. As an artists, you will be experimenting a lot of drawing tools and use them in your pen and ink rendering works. The useful pens are not necessarily expensive, there are tons out there that you can experiment with.
Mechanical Pencil
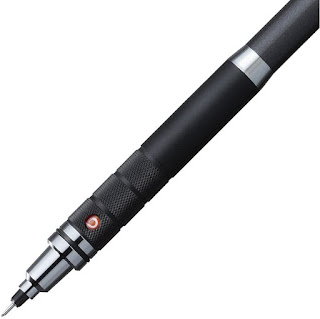 Pencil are very useful in the architectural sketches. This is a mechanical pencil is different from the usual pencil. It is called mechanical because you can control the lead coming out from the tip and it comes in different thickness. For beginners, this is always the "Rule of Thumb" - "Never draw without a guidelines", Yes, the pencil plays that important role. You can use this thin line as a guide to your drawing and this is usually when you want to finalize your pen and ink sketches. This will help you make a clean presentation. Though seasoned architects and artists go directly to their design sketches using pen. As a beginner, it would help a lot do this exercise to master the control of your hands. The later, sketch freely with precision.
Fine Point Pen

The sketch of an architect can be very interesting and every line you will see tells a story. The strokes means a lot and may even pose a work of art at some point. That is why it is good to keep all your sketches and when you put them all together, you can create a story line leading to the development of the design study or it can be plainly considered as a work of art.
That's the uniqueness of the architectural profession, it is an art and a science. The combination of which is architecture.
Marker Pens

Marker Pens are a good complement to your pen and ink renderings, this will be covered in another post but to give you a brief overview, you can add color into your drawings using these marker pens. The pen and ink rendering is already complete in itself and will stand out in the presentation, but adding color would create a different artistry and impression to the drawing. You can decide whether to use this or not but you can also plan for which type pen and ink rendering presentation you will be using this. For Architects, Pen and Ink are usually for the design study and analysis where you are still developing the design idea. The changes in design are evolving and mostly the editing is quick and it is done in the same sketch. Some use other tracing papers to overlay the original drawing and do the editing on the new tracing paper, so as to get comparison with what is working based on the design concept of the building he is working on.
Markers on the other hand are used as a finishing touch to the sketch, though it is still in the schematic stage, it goes further on the design study to represent the color schemes of the building design idea and make the initial design study on the building materials.
You can find this in Amazon. I was browsing through the internet and I have come across these marker pens which i thought would add to the additional information you need in your pursuit to improving your sketching skills and visual presentation techniques. Here's the link to this product on Amazon.